
Applying a fresh coat of sealer to an asphalt surface is one of the most important steps to maximizing the longevity of a driveway or parking lot. It’s also one of the easiest. All it takes to properly apply sealer to blacktop is following a handful of simple steps. With just a little bit of practice, anyone can master this important task, while also saving a bundle in the short and long term.
Video on how to sealcoat asphalt
The following is a brief outline of the basic steps of asphalt sealcoating to introduce you to the process.
For a full guide to asphalt maintenance, download our free Pavement Asset Management Course.
As with most property maintenance jobs, much of ensuring the success of the project comes from proper preparation. For asphalt sealcoating, that includes the first four major steps.
Prepare to Sealcoat:
1. Check the Weather
Asphalt sealer doesn’t cure properly when exposed to moisture. It’s important to check the weather before making any preparations, otherwise you’ll end up with disappointing results that won’t effectively protect the surface. Reschedule your project if the forecast calls for rain or fog within the next full day.
The best time for sealcoating is during the summer months when the weather is dry and temperatures remain above 50ºF.
2. Clean the Surface
Asphalt sealer only applies properly to a surface when it’s clear of debris. That includes loose asphalt, dust and vegetation. Powered blowers are best for this step, but a broom should do the trick, as well.
3. Block Off the Area
It’s critical that traffic remains off the blacktop for asphalt sealer to cure properly, without unsightly streaks or blotches. Use cones and caution tape to clearly mark where vehicles and pedestrians should avoid.
4. Prep Your Sealcoating Machine & Supplies
Sealcoating machines come in a variety of different models that are suited for different purposes, but they all work in roughly the same way, requiring equipment checks, priming and loading.
Sealcoating Tips
Your asphalt sealer must also be prepped for the best outcome. The ingredients in asphalt sealer separate when left sitting for long periods of time. Stirring it thoroughly before hooking it up to your spray system will ensure they’re evenly dispersed throughout the container.
Not using a sealcoating machine? That's perfectly fine! You can also sealcoat your driveway by using a sealcoating brush. Ensure your sealer is mixed well before going to the next step.
Once those four steps are completed, applying the sealer is a pretty simple operation.
5. Apply the Sealer
The best way to start is by sealcoating the edges first—just be sure not to close yourself in by sealing along every edge at once! After the edges of the surface are covered, you can begin filling in the rest. Do this by moving the wand back and forth at a slow and steady pace while slowly walking, so that the remaining area is covered.
Consistent wand height is also very important when applying sealer. For the best results, hold the wand at waist level, straight out so that the stream of sealer sprays straight down. This will help eliminate skipped spots and takes the streaks out of the pattern.
Tip: A sealcoat edger is an excellent tool to keep your stream contained and sealer off walls, doors and any other areas you don’t want covered.
The size and shape of the stream of sealer being sprayed from your system will depend on the gallons per minute (GPM) associated with the spray tip you’re using. Those with with a greater GPM will give you greater coverage with less precision. If you’re looking to sealcoat a smaller area and have greater control over the stream, a spray tip with fewer GMP is preferred.
Tip: If you’re new to sealcoating, you can practice the application process by running water through the system instead of sealer. Just be sure to let the asphalt dry before applying the real coat.
For manual applications: Start at the top of your driveway by pouring some sealer out onto the clean surface. Use your sealcoating brush to do the edges, and go back and forth to cover the entire driveway evenly. Take care to not leave footprints or bootprints.
After you've applied the first coat, it should be left to dry for about six hours before applying the second coat. After you’ve applied two even coats to the surface, it will be walkable within a few hours, but should not be driven on for at least a full day, to prevent leaving any marks.
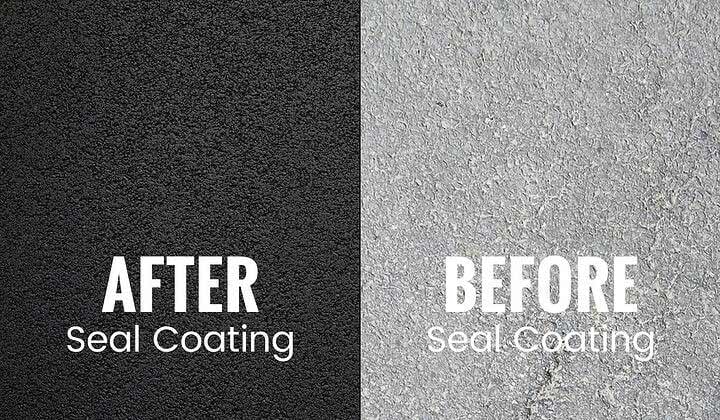
When it's cured completely, you’ll have a beautiful blacktop surface that’s protected against the elements.
Asphalt Kingdom has all the supplies and equipment you need to sealcoat your asphalt like a pro. Explore our online store to find exactly what you’re looking for.


.png?width=200&height=300&name=First%20page.pdf%20(1).png "Start a Business Blueprint")


.jpg)

