Most people aren’t familiar with the term, and unless you work in paving, you might not have heard it before. Odds are you’ve driven over this recycled material many times without knowing it.
FREE DOWNLOAD!

Get your FREE ebook on how not to ruin your asphalt
Table of Contents
- What Are Millings?
- Why Choose Millings for a Driveway?
- The Installation Process
- How Millings Compare to Other Driveway Options
- Maintenance Tips for Millings Driveways
- Common Questions
- Pothole and Crack Patching
- Getting a Driveway That Lasts
What Are Millings?
Asphalt millings are nothing more than bits of old asphalt paving that have been broken up. They can then be repurposed and used to patch potholes, repair cracks in driveways and parking lots, or even used as surfacing material for new driveways and roads.
Because the material is reclaimed, it’s environmentally friendly and more affordable than sourcing fresh mix. That helps rein in project costs while keeping tons of waste out of landfills.
This guide walks through driveway design, installation steps, and basic pothole and crack repair using millings.
Why Choose Millings for a Driveway?
Thinking about a new driveway for your property? Using asphalt millings offers several advantages compared to hot-mix asphalt, gravel, or concrete:
1. Cost Savings
Millings are significantly less expensive than fresh asphalt. You’re using recycled material, which means you can often cover a large area for a fraction of the cost of a traditional driveway installation.
2. Eco-Friendly
Every ton reused is a ton not dumped. You reduce waste while still getting a strong, long-lasting surface.
3. Low Maintenance
Properly installed millings bond and harden over time. Unlike loose gravel, they compact into a firm base that needs less raking and fewer touch-ups.
4. Durability
With good prep and compaction, the surface stands up to heavy rain and freeze-thaw cycles better than gravel.
5. Aesthetics
You get a clean, dark finish that resembles new asphalt without the premium price tag.
Related: What is Asphalt Stabilization? Understanding Physical and Chemical Techniques
The Installation Process
Can you DIY a millings driveway? It depends on your tools, experience, and base condition. Here’s the typical flow:
Step 1: Preparing the Base
Like any paving project, your foundation matters most. You’ll need to clear the driveway area of grass, roots, and debris. If you’re replacing an old driveway, make sure the base layer is still solid. If it’s uneven or soft, add and compact new aggregate before laying millings.
Step 2: Spreading the Millings
Millings are usually spread in a layer roughly three to four inches deep. Use a skid steer or tractor for large areas, but hand tools work fine for smaller driveways. Your goal will be to put down an even layer without ridges or piles.
Step 3: Compacting the Surface
Compaction is the secret. A vibratory roller presses the material so it interlocks and binds into a smooth, dense surface. Without proper compaction, the top stays loose and won’t last.
Step 4: Optional Sealing
Some homeowners choose to seal the surface with a commercial-grade emulsion. This isn’t strictly necessary, but sealing can speed up the bonding process, improve water resistance, and give your driveway a darker, more uniform finish. For millings specifically, many contractors get reliable results using an asphalt millings rejuvenator to help bind and protect the surface.
How Millings Compare to Other Driveway Options
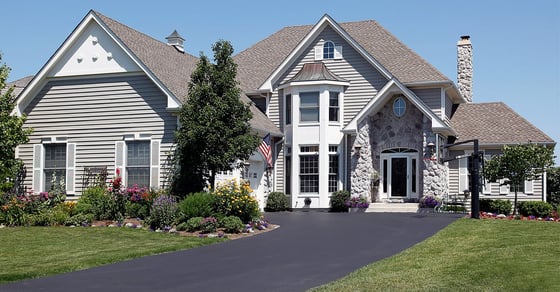 Driveway installation using asphalt millings
You’ve got choices, and each has trade-offs. Here’s a quick comparison to help decide if asphalt millings are the right fit:
Maintenance Tips for Millings Driveways
While easier than gravel, this surface isn’t completely maintenance-free. A few habits will maximize life:
- Compact occasionally: If you notice loose areas forming, run a roller over the area to tighten it back up.
- Add new millings when needed: Over time, traffic may displace some material. A light top-up layer can refresh the surface.
- Keep it clean: Sweep or blow off leaves, dirt, and debris so they don’t break down and weaken the surface.
- Watch drainage: Standing water is the enemy of any driveway. Make sure the slope directs water away from the surface. Drainage should be part of your initial planning because there are few things more important.
Related: The Impact of Weather on Asphalt (+ How to Protect Your Pavement)
Common Questions
Do millings get hard like new asphalt?
With proper compaction, asphalt millings form a firm, cohesive surface that continues to tighten over time. It’s not identical to fresh, hot-laid asphalt, but it’s far more stable than gravel.
Will weeds grow through a millings driveway?
Weeds are much less likely to penetrate than with gravel. However, it’s not weed-proof the same way a newly paved surface is. If you want the most protection, adding a geotextile fabric under the base layer can help a lot.
How long will it last?
If it’s installed professionally, you can expect it to last 20+ years, depending on your climate and the amount of traffic. The more extreme your weather is and the more traffic the surface sees, the shorter its lifespan will be (and the more maintenance you’ll need to handle).
Can I install it myself?
Yes, if you have access to a roller and the driveway is small, it’s feasible to do it yourself. For large driveways, it’s better to hire a professional asphalt contractor to get the job done right.
When Millings Make the Most Sense
This option shines when:
- You need a cost-effective solution for a long or wide driveway.
- You live in a region with harsh freeze-thaw cycles, since millings handle temperature changes well.
- You prefer a low-maintenance surface that won’t wash out in heavy rain.
- You want a driveway that looks more polished than gravel without paying for new asphalt.
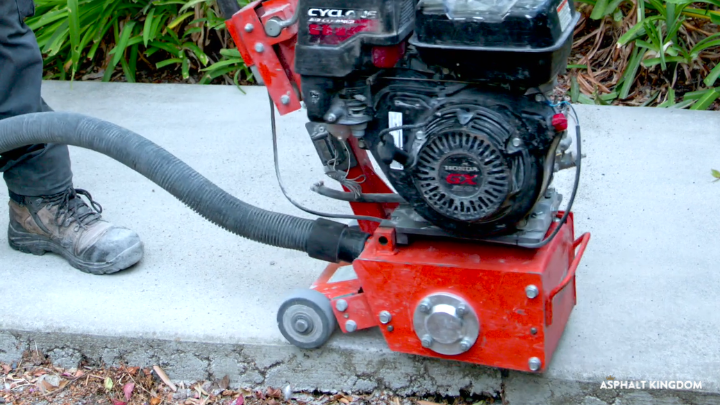
Pothole and Crack Patching
Asphalt millings also work well when it comes to repairs, like crack filling and patching potholes. First, clean the area completely. Next, use an infrared heater to soften the existing asphalt, then mix the softened asphalt. An asphalt hot box keeps hot mix or recycled RAP at working temperature so your patch stays hot and workable during compaction. Add millings and mix them well with the existing material, then compact everything with a roller or tamper.
Getting a Driveway That Lasts
If you want a surface that lowers cost, boosts durability, and looks great, asphalt millings are hard to beat. A well-installed drive gives many of the benefits of hot-mix without the high price and with less upkeep than gravel.
However, if you want your driveway to last, the key is good preparation and compaction. Get those steps right, and you’ll have a driveway that performs well for decades, all while saving money and making an environmentally friendly choice. If you’re thinking about starting your own asphalt maintenance business, make sure to check out the Asphalt Kingdom Build Your Own Business Blueprint.

.png?width=200&height=300&name=First%20page.pdf%20(1).png "Start a Business Blueprint")