What's the big deal about parking lot design? Don't you just lay down some stripes and call it a day?
Actually, having proper striping and spacing of parking lot lines and the clear marking of parking areas, arrows, and handicap signs are vital to any parking lot design. By thinking things through carefully first, you can maximize the use of space in your parking lot, make traffic flow more easily, and make for a better experience for your customers or tenants.
Layout Considerations
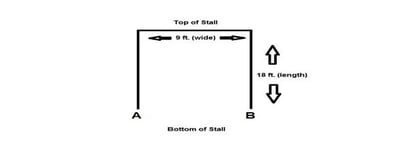
Ideally, when laying out a plan for a parking lot design, it’s best to provide at least 8.5 feet for each stall. Stalls that are narrower than this can result in your customers’ car doors being dinged. Consider the relatively narrow size of cars from the 80s and 90s versus the much larger minivans and SUVs that came into popularity afterwards. Hot on their heels came the tiny Smart Car and Mini Cooper. Predicting vehicle sizes is not easy! Future-proof your lot by allowing enough space for people to move comfortably.

Pressed for space? Then a mix of large-vehicle spots and small-vehicle spots are the perfect answer.
Some things to consider:
- If your customers are likely to have shopping carts at their car, allow for extra space so they can pull them up easily to side doors.
- The same thing if new parents are your target customer—making enough room for strollers is a must.
- Do you sell marine products, camping accessories or farm implements? If a number of your customers at any given time are likely to have trailers, a few double-length parking spots will make them feel comfortable at your store.
A properly laid out parking lot design should have a logical traffic pattern that will accommodate the easy flow of cars in and out of spaces. Get complete instructions on parking lot layouts with our free line striping course.
Greening Surface Parking Lots
Asphalt parking lots can be lifeless, heat-producing utility areas, or they can be a vibrant contributor to the environment by providing thoughtful parking options that contribute to pedestrian comfort, managed run-off water, and a part of urban cooling strategies by providing shade islands and managing storm waters.
 To learn more about one city's Greening efforts, download the free Design Guidelines for 'Greening' Surface Parking Lots developed by the city of Toronto, Canada.
The 'aisle' is the area that provides a route between parking stalls. If your parking lot design calls for an angle of 45 degrees, then you will need a 12-foot wide aisle. If your parking stalls are at a 90 degree angle, then you will need a width of 26 feet for safe dimensions.
In areas where pedestrians are likely to be crossing, many parking lot designers use speed bumps or speed humps to slow down traffic and encourage pedestrian safety. If you add these features to your lot, ensure that you mark the area with bright stripes to alert drivers of their presence.
The Right Equipment
A parking lot striper is the easiest way to paint straight lines on asphalt or concrete surfaces. It’s also possible to simply use a paint roller, but that can be messy and somewhat inaccurate, compared to an inexpensive parking lot striper. The parking lot striper is easy to use, allowing you to adjust the width of the lines from two inches to five inches.
For parking lot designs, it’s best to use it with AK Commercial Asphalt Paint available in eight colors, it’s highly pigmented and dries tack-free in less than an hour. Left overnight, the paint dries completely, leaving you with a glossy, vibrant finish. Each case of twelve 20 ounce cans can paint up to 1000 linear feet.
If you need to mark handicap spaces, loading zones, arrows, or any other type of sign for your parking lot design, you will need a parking lot stencil kit that allows you to clearly paint a wide variety of markers. These stencils can be used on both concrete and asphalt design. These are also recommended to be used with AK Commercial Asphalt Paint.
Preparing the Surface
Before painting your asphalt design, make sure to barricade marked areas. These areas should be off limits to both foot and vehicle traffic until the paint is completely dry. Next, thoroughly clean the surface of the lot to remove dirt, sand, gravel, oil, and leaves. This is best accomplished with a gas powered blower. Inspect for cracks and potholes and repair these before you paint.
For best results, the asphalt should also be sealed with an emulsion sealer to give the asphalt a clean slate black finish. This will allow the lines and markers to appear clearer to your customers.
Once all of this preliminary work has been completed, you can begin painting. Remember paint should only be applied when there is dry weather and the temperature exceeds 50 degrees F. (unless mfg. specifications state otherwise). Also, don’t forget to protect curbs, walkways, and fences that you don’t want painted before you begin spraying your parking lot design.


